How to Cold Press Juice (With or Without a Juicer)
Did you know that cold-pressed juice retains more nutrients and enzymes than juice made using traditional high-speed methods? Unlike centrifugal juicers that generate heat and foam, damaging delicate vitamins through oxidation, cold pressing gently extracts juice without heat, preserving the raw flavor and nutritional integrity of fruits and vegetables. That’s why health-conscious home cooks and wellness seekers are turning to this method as their go-to for vibrant, nutrient-dense juice.
Cold pressing at home is more accessible than you might think, whether you own a slow juicer or you're working with just a blender and a strainer. In this guide, we’ll walk you through the ins and outs of how to cold-press juice, covering both juicer and no-juicer methods, while answering key questions about ingredients, taste, nutrition, and proper storage. By the end, you’ll feel confident creating delicious, custom juice blends from your own kitchen, with or without fancy equipment.
What Is Cold-Pressed Juice
Cold-pressed juice is made using a hydraulic or masticating press that crushes and slowly squeezes fruits and vegetables to extract juice. This method doesn’t rely on spinning blades or high heat, which means there’s minimal oxidation, allowing the juice to maintain its natural color, rich flavor, and dense nutrient profile for longer.
On the other hand, traditional juicing methods often create foam or separate quickly; cold-pressed juice tends to be smoother and more stable. It’s especially popular among those looking to boost their intake of raw vitamins, minerals, and enzymes in a highly absorbable form. You’ll often find cold-pressed juices in juice bars, wellness shops, and high-end cafes, but they’re entirely achievable at home with the right technique.

Choosing Ingredients for Cold-Pressed Juice
Great cold-pressed juice begins with fresh, high-quality ingredients—the kind that burst with flavor and nutritional value. Whenever possible, opt for organic produce to minimize pesticide exposure and guarantee the cleanest taste. A smart starting point for most blends is the 80/20 rule: use 80% vegetables and 20% fruit. This helps keep sugar levels in check while still delivering a naturally sweet, refreshing flavor.
Start by building your base with leafy greens (like kale or spinach), root vegetables (such as carrots, beets, or turmeric), and tough stems (like celery). These nutrient-rich choices add depth and body to your juice. Add brightness with citrus fruits—lemons, limes, oranges, or grapefruits work beautifully to balance earthy notes. Enhance the finish with soft fruits (like mangoes, papayas, or pears) and tropical fruits (like pineapple or guava) for a naturally sweet lift.
Don’t forget to include fresh herbs like mint, parsley, or basil for subtle flavor complexity. The key is to work with a colorful array of fruits and vegetables and explore complementary flavor profiles, like pairing sweet with tart, earthy with acidic, or mellow with spicy.
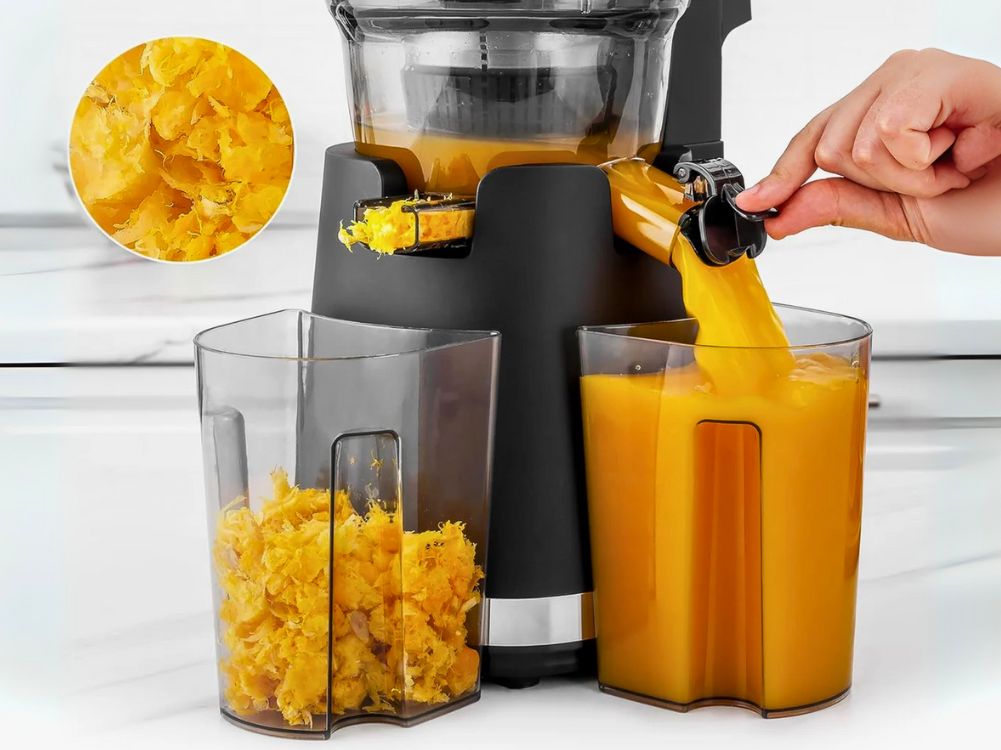
How to Make Cold-Pressed Juice With a Juicer

Cold-pressed juicing begins with the right tool, which is a masticating juicer, also known as a slow juicer. Unlike a centrifugal juicer, which uses high-speed spinning blades that create heat and oxidation, a masticating juicer relies on the cold pressing method, which is crushing and pressing fruits and vegetables to extract juice slowly, preserving enzymes and nutrients.
Step 1: Prep Your Fruits and Veggies
Before you start, always prep your fruits and veggies. Wash them thoroughly, trim any tough stems, and chop them into pieces that fit comfortably into the feed chute. Following proper ingredient portions will help you get the most out of every batch without clogging your machine.
Step 2: Use the Right Juicer Features
Choose a juice extractor with easy-clean technology to make post-juicing cleanup easier. A model with a detachable pulp container and mesh screen provides smooth juice with minimal pulp, while reducing time spent scrubbing afterward.
Step 3: Start the Cold Pressing Method
Slowly feed your ingredients through the feed chute one portion at a time. The slow juicer’s grinding mechanism gently presses out the liquid without creating heat, which helps preserve flavor and nutritional value.
Step 4: Monitor Juice Yield and Adjust as Needed
Depending on your produce and juicer model, your juice yield may vary. Leafy greens and soft fruits may require combining with firmer ingredients to push everything through efficiently. But don’t rush. Letting the juicer work at its pace gives you the best results.
Step 5: Clean Up Smart
Once juicing is complete, disassemble the parts and rinse immediately. Thanks to modern easy-clean technology, some juicers offer self-cleaning or quick-rinse features that keep everything mess-free. Be sure to empty the pulp container and scrub the mesh screen to prevent clogging over time.
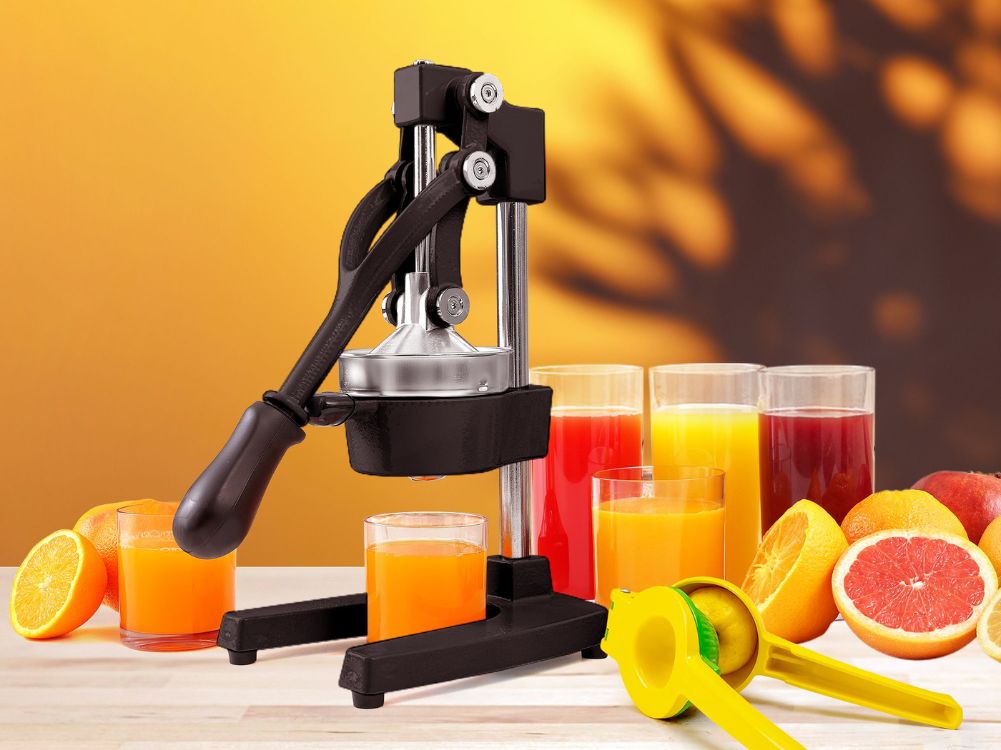
How to Make Cold-Pressed Juice Without a Juicer

You can still enjoy nutrient-rich cold-pressed juice using tools you likely already have, such as a blender, food processor, cheesecloth, or a fine-mesh strainer. While the process takes a bit more effort than using a juice extractor, the results are still delicious and packed with goodness. Here's how to do it:
Step 1: Prep Your Ingredients
As with any juicing method, begin by washing and chopping your produce. Use ingredient portions that blend well- mix soft fruits with leafy greens, root vegetables, or tropical fruits for flavor and texture balance. Remove seeds and tough stems where necessary to avoid bitterness or texture issues.
Step 2: Blend Until Smooth
Add your prepped produce into a blender or food processor. Add a small amount of water (¼ to ½ cup) to facilitate blending. Pulse until you get a thick, smooth puree. This mixture is not juice yet; it’s just your base for extraction.
Step 3: Strain the Juice
Place a fine mesh strainer, cheesecloth, or sieve over a measuring cup or bowl. Slowly pour the blended mixture through, pressing it gently with a spoon or spatula. To extract the clearest juice possible, double-strain the liquid- once through the mesh or sieve, then again through a layered cheesecloth.
Step 4: Check Juice Yield and Adjust
Your juice yield may be slightly lower than with a masticating juicer, but the flavor can still be bold and refreshing. Depending on the blend, you can return the remaining pulp to the blender with a bit more water and repeat the process to get every last drop.
Step 5: Cleanup
Though there are more parts to clean, the tools used (blender, cheesecloth, and strainer) are generally dishwasher-safe or easy to rinse out. For less mess, clean your equipment right after juicing to prevent pulp from drying and sticking.
Juicer vs. Blender
While a juicer vs. blender comparison shows that juicers offer higher efficiency and convenience, the blender/strainer method gives you a great entry point into cold-pressed juicing, especially if you’re just starting out or prefer a more hands-on approach.

Storing Cold-Pressed Juice
Once you’ve made your vibrant, nutrient-rich cold-pressed juice, proper storage is key to preserving both its taste and health benefits. Unlike pasteurized juices, fresh cold-pressed juice is highly perishable. Without preservatives or heat treatments, it begins to degrade quickly due to oxidation, sun exposure, and temperature changes.
Choose the Right Container
Always store your juice in an airtight container to reduce exposure to air and slow down oxidation. Glass bottles or mason jars are ideal, as they’re non-reactive and help maintain nutrient retention. Avoid plastic containers, which can leach chemicals and affect flavor over time.
Keep It Cold
Low-temperature storage is essential. Immediately place your juice in the refrigerator after pressing. The optimal temperature is between 32°F and 40°F (0°C to 4°C). This helps extend the shelf life to about 3 days, although drinking it within the first 24–48 hours ensures peak freshness and nutrition.
Freeze for Longer Storage
If you’ve made a large batch, freezing is a smart way to preserve your juice. Pour the juice into freezer-safe glass bottles or ice molds, leaving about an inch of space to allow for expansion. Thaw overnight in the fridge before consuming, and shake well before drinking. Note that some separation may occur, but the taste and nutrients remain largely intact.
Keep It in the Dark
Light exposure, especially from the sun or bright kitchen lighting, can speed up nutrient loss. Store juice in a shaded part of your fridge or in opaque containers if possible. Reducing sun exposure helps preserve vitamins like C and A.
Extra Filtering for Clarity
Before storing, you can further strain the juice using cheesecloth or a nut milk bag to remove extra pulp or foam. This not only improves the juice’s clarity and texture, but can also slow spoilage by reducing organic matter left behind in the container.
Cold-Pressed Juice Recipes and Flavor Enhancements

1. Emerald Elixir
This deeply nourishing green juice packs a punch with leafy greens, citrus, and herbs. You can add a splash of aloe juice for digestive support and subtle bitterness that balances the sweetness of apples.
Ingredients:
- Kale or spinach
- Green apple
- Cucumber
- Lemon juice
- Mint or parsley (fresh herbs)
- Coconut water (optional, for added hydration)
2. Carrot-Ginger-Lemon Zinger
A bold, immunity-boosting juice that’s perfect for mornings.
Ingredients:
- Carrots
- Fresh ginger root
- Lemon juice
- Orange or pineapple (for sweetness)
Zulay Says: Toss in a pinch of turmeric powder for anti-inflammatory benefits and a gentle earthiness. This combo also pairs well with a touch of black pepper to enhance turmeric’s absorption.
3. Beet Juice Boost
Deep red and full of antioxidants, this blend is a great post-workout refresher. Add a small scoop of chia seeds or flax seeds for extra fiber and omega-3s. Shake before drinking!
Ingredients:
- Beets
- Apple
- Celery
- Lemon
- Citrus peel (just a sliver to enhance aroma and brightness)
4. Hydration Hero
If you're juicing on hot days, this is your go-to. Feel free to add a sprig of basil or mint to make it taste like a spa-day in a bottle.
Ingredients:
- Watermelon
- Cucumber
- Lime
- A splash of coconut water
Batch Juicing Tips
If you’re planning to batch juice, it’s best to stick to ingredients with a longer shelf life, like carrots, beets, and apples. Always store your blends in airtight glass bottles and refrigerate immediately. Adding citrus, like lemon or lime, helps slow oxidation and keeps flavors bright over time.
Remember to label each bottle with the date and ingredients, as this makes choosing your juice for the day easier and more fun.

Health Benefits of Cold-Pressed Juice
Cold-pressed juice is loved for its exceptional nutrient density, offering a concentrated source of vitamins, minerals, and antioxidants that support immunity, energy, and digestive health. Because the cold pressing method minimizes oxidation, these juices retain more nutrients compared to traditional methods and are free from added preservatives. While cold-pressed juice typically contains less soluble fiber than whole fruits and vegetables, it remains a powerful way to boost daily nutrient intake, especially for those seeking improved skin health and overall wellness. For maximum benefit, it's best to enjoy cold-pressed juice as part of a balanced lifestyle and consume it within its natural shelf life to preserve its freshness and nutritional value.
Zulay's Final Thoughts
Cold-pressed juice is a thoughtful commitment to your health and wellness. By extracting juice through the cold pressing method, you preserve the delicate vitamins, enzymes, and antioxidants that your body craves. Using a masticating juicer at home or sourcing fresh blends from a trusted brand, cold-pressed juice delivers clean energy, immune support, and digestive benefits without relying on additives or preservatives. It’s also an excellent way to increase your intake of fruits, vegetables, and herbs, especially when life gets busy.
With smart ingredient choices, proper storage, and a little creativity, you can enjoy a flavorful, nutrient-dense beverage that supports your lifestyle and tastes incredible. From a glass of beet-carrot elixir in the morning to a hydrating citrus-ginger blend in the afternoon, cold-pressed juice is more than a trend. It’s a daily ritual of nourishment, clarity, and care.

Leave a comment
This site is protected by hCaptcha and the hCaptcha Privacy Policy and Terms of Service apply.