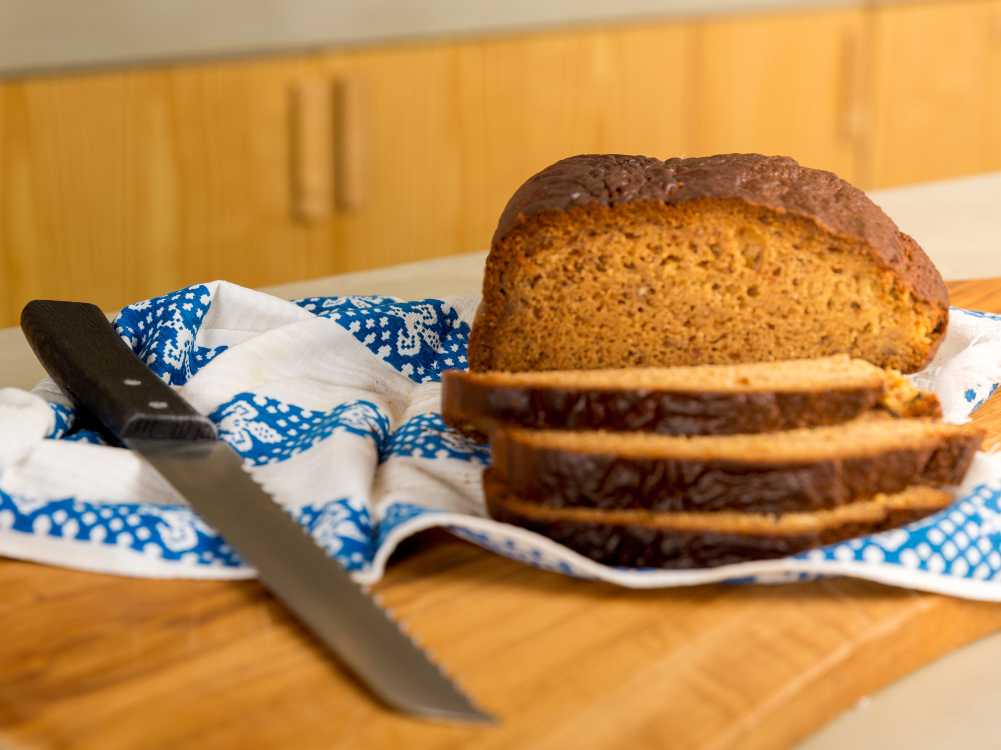
How to Make Gluten-Free Bread
If gluten-free bread were a person, it would be the hero at a party—often overshadowed by its flashy gluten-packed cousins but absolutely essential once you get to know it. And let’s be honest, store-bought gluten-free bread? It’s either a crumbly disaster or a rubbery science experiment that leaves you questioning your life choices. But don't worry, this recipe is about to change the game!
A gluten-free diet isn’t just a trend—it’s a necessity for those with celiac disease or gluten sensitivity. According to Johns Hopkins Medicine, eliminating gluten, a protein found in wheat, barley, and rye, helps prevent serious digestive issues and inflammation. But cutting out gluten shouldn’t mean settling for subpar bread.
With that this recipe involves a loaf that is soft and airy on the inside while sporting a crust so crisp it could star in a baking competition. Seriously, it makes you wonder why you ever settled for that sad store-bought bread in the first place!
Ingredients
-
- 500g Mixed Bread Flour
- 7g Dried Yeast
- 100g Margarine
- 3 Eggs
- 300ml Lukewarm Water
- 1 Pinch of Salt

How to Bake Gluten-Free Bread
Step 1: Mixing It Up
Start by grabbing a large mixing bowl and mixing your flour blend with the dried yeast. A quick stir is all it takes to get these two acquainted. Next, add in your margarine, eggs, and lukewarm water.
Spend about five minutes working it, either by hand or using a stand mixer with a dough hook if you’re feeling fancy. You’re looking for a smooth, cohesive dough ready to rise and shine.
Step 2: Rise and Shine
Pour your dough into a greased and floured aluminum baking pan. Use a wet spatula or a silicone spatula to smooth out the top—since the gluten-free dough doesn’t hold its shape, the pan does the heavy lifting here. Cover the pan with a clean cheese cloth and set it in a warm, cozy spot.
Give it about 30 minutes or until it’s doubled in size. During this time, the yeast works its magic, creating those lovely little air pockets that give the bread its texture.

Step 3: Time to Bake
Preheat your oven to 200°C and place a pan of water on the bottom rack. This steam bath will help your bread get that crisp, bakery-style crust without drying out the interior. Pop your dough in the oven on the middle rack and bake for 10 minutes.
After 10 minutes, drop the heat to 180°C and let it continue baking for another 40 minutes. You’ll know it’s done when the top is golden brown, and a toothpick inserted into the middle comes out clean. (If it looks a little too perfect to be true, it’s because it is—this is what gluten-free dreams are made of!)
Step 4: Cool, Slice, and Devour
Let the bread cool on a wire rack before slicing with a bread knife. As it cools, the crumb sets up beautifully, giving you perfect slices every time.

Zulay's Expert Tips for Mastering Your Gluten-Free Loaf
- Temperature Matters: Keep your water lukewarm to ensure the yeast activates properly. Too hot, and you’ll kill the yeast; too cold, and it won’t rise.
- Patience is Key: Letting the dough rise fully before baking is crucial. This step can’t be rushed—good things come to those who wait.
- Experiment with Add-Ins: Seeds, herbs, maybe even a little garlic powder—customize your bread to fit your mood. Just don’t overdo it, or you’ll mess with the texture.
Zulay's Final Thoughts
Baking gluten-free bread at home embraces a new level of flavor and freshness that store-bought just can’t compete with. Whether you’re new to gluten-free living or a seasoned pro, this bread will earn a permanent spot in your recipe rotation. So grab your ingredients, warm up that oven, and let’s make some bread that will have you questioning why you ever settled for anything less.

Let us Know What You Think!
Did we miss any information? Are you excited to try this recipe? Leave a comment below telling us your thoughts and what recipes you want to see next.
Know Someone Who Should Read This?
Share this piece with your friends across all social media platforms! Don't forget to tag @zulay_kitchen and #kitchenhappiness!
FAQs About Gluten-Free Bread
Why is my bread dense?
It’s easy to overwork gluten-free dough, which can result in a dense loaf. Make sure to knead just enough to combine the ingredients, and don’t skip the rise.
Can I make it dairy-free?
Absolutely. Swap margarine for a plant-based butter alternative, and you’re good to go.
How do I store my bread?
Wrap it tightly and store at room temperature for up to 2 days, or slice and freeze for up to a month. Just toast slices straight from the freezer, and you’re back in business.







Leave a comment
This site is protected by hCaptcha and the hCaptcha Privacy Policy and Terms of Service apply.